Using the piLagTester to measure display input lag: step by step
The piLagTester a 100% software solution for measuring input lag on the raspberry pi zero. If you have already installed the piLagTester to your raspberry pi then you are ready to make measurements.
 0) Camera orientation. First, you need to make sure your camera is capturing the output of the Pi's LED at the same time it's capturing the target bar. This depends on the orientation of your camera. The reason is that camera's don't actually record all pixels at the same moment in time. Instead they scan from one side of the sensor to the other. How long this takes is unknown, but definitely influenced my results. What we want is to set up the camera so that it's scanning from left to right (or right to left). Thus, the vertical extent of the target bar will be determined entirely by what the display has shown, and not at all by how far DOWN the screen the camera has scanned.
You can determine this by setting your camera to the highest frame rate (or set it to take a very short exposure photo) and record your display with a solid white image. The backlight will flicker on and off much faster than the refresh rate of the screen, changing how bright that "white" image is. If the screen varies in brightness like the picture at left then you have found the proper orientation of your camera: Every vertical line of pixels were captured at the same moment of time; but moving left to right in the image shows different times, including a period where the backlight was off (the dark region). What you don't want to see: the samge image, but the dark/bright regions running left to right.
 1) to start the program you type inputLagLED at the prompt after logging in as root. If you can't login as root, then you can type sudo bash to get a root prompt. The photo at right shows what to expect. The leftmost vertical bar is the "target". It has not finished drawing in this frame, which is why it is dark at the bottom. To the right of this is a stair step of intensities from black to white; these are a visual aid for measuring how far down the screen the bar extends and also camera exposure. The rightmost vertical bar could be confused for the target but actually only turns off the same frame the target turns on. This is designed to keep any auto dimming or dynamic contrast enhancement from confusing the results, and also helps your camera have the proper exposure. Finally, just off the edge of the photo at right is a set of numbers. These tell you the current frame of animation - the target turns on at frame 0. This helps you fast forward thru your video to get to the interesting frames.
2) Pi placement. Now that you have the camera oriented so that each vertical line of pixels are captured at the same moment, you need to place the pi so that the LED is captured at the same moment the bar is photographed. That means placing it below the target bar (ie, at the lower left edge of the display). The height of the Pi doesn't matter, just the left-right position. See photo at right.
2) Record! Once you have everything lined up properly just start taking a movie at the maximum frame rate of your camera (recall that 60hz is good enough but 240hz or higher makes the math much simpler). You'll want to record about 10 appearances of the white bar before stopping (Esc), just to be sure you have enough data.
3) Analyze. As discussed in the general overview, the simplest way to measure lag is to find the first frame of video where the LED goes from off to on - any amount of LED increase in illumination counts. Then from there count the number of frames until the target bar appears. This, times the length of each frame of video (1/FPS) gives the lag. An example: below are 3 frames of video, the first at left being the first frame of video where the LED turns on. We don't count that one. Then we count the next (middle frame). Then we count the frame where the target becomes visible. That's two frames times the refresh rate of the camera (NOT the monitor).

Note: why don't we count it as 3 frames? Because we don't know when the LED turned on, so we assume halfway thru the captured frame of video. And we don't bother to estimate when the target bar started to appear in the last frame, so again we assume halfway. so you could say we count 0.5 + 1 + 0.5=2. But it's easier to just count the last frame as 1 and skip the halfsies.
Good software for this does not appear to be available for android. But on the desktop there are lots of movie editing apps which allow you to step ahead and back by single frames. I use shotcut (Win/Mac/Lin).
5) Measuring input lag for interlaced content, or different resolutions. Retro gamers will be particularly interested in input lag for 480i and 480p signals. The Pi can produce such signals over HDMI, which is probably the same as sending it over analog cables (both are realtime scanout protocols, at least). I've included several mode settings scripts:
tv1080p
tv480i
tv480p
tv720p
tvnative
The last one can be useful for checking the display's native resolution in a hurry. Also, the pi defaults to 1080p in some cases where the display can't handle it, so you could always type tvnative blind after logging in as root.
6) Supporting burst high-speed cameras. You can change the length of time the target bar is on the screen, to, for instance, capture several cycles of bar presentation on a high speed camera that only captures in short bursts. Type inputLagLED 8 to run it much faster, though this isn't really recommended unless your monitor has very little lag and super fast response time. The default is 20, the not so safe min is 4. A whole cycle of target and non target bars takes 2x the number you provide, divided by the refresh rate.
7) supporting slow cameras. Just to remind you, a slow camera doesn't stop you from using this tool, as long as it can record at 60 hz and you can do simple math.
 0) Camera orientation. First, you need to make sure your camera is capturing the output of the Pi's LED at the same time it's capturing the target bar. This depends on the orientation of your camera. The reason is that camera's don't actually record all pixels at the same moment in time. Instead they scan from one side of the sensor to the other. How long this takes is unknown, but definitely influenced my results. What we want is to set up the camera so that it's scanning from left to right (or right to left). Thus, the vertical extent of the target bar will be determined entirely by what the display has shown, and not at all by how far DOWN the screen the camera has scanned.
You can determine this by setting your camera to the highest frame rate (or set it to take a very short exposure photo) and record your display with a solid white image. The backlight will flicker on and off much faster than the refresh rate of the screen, changing how bright that "white" image is. If the screen varies in brightness like the picture at left then you have found the proper orientation of your camera: Every vertical line of pixels were captured at the same moment of time; but moving left to right in the image shows different times, including a period where the backlight was off (the dark region). What you don't want to see: the samge image, but the dark/bright regions running left to right.
 1) to start the program you type inputLagLED at the prompt after logging in as root. If you can't login as root, then you can type sudo bash to get a root prompt. The photo at right shows what to expect. The leftmost vertical bar is the "target". It has not finished drawing in this frame, which is why it is dark at the bottom. To the right of this is a stair step of intensities from black to white; these are a visual aid for measuring how far down the screen the bar extends and also camera exposure. The rightmost vertical bar could be confused for the target but actually only turns off the same frame the target turns on. This is designed to keep any auto dimming or dynamic contrast enhancement from confusing the results, and also helps your camera have the proper exposure. Finally, just off the edge of the photo at right is a set of numbers. These tell you the current frame of animation - the target turns on at frame 0. This helps you fast forward thru your video to get to the interesting frames.
2) Pi placement. Now that you have the camera oriented so that each vertical line of pixels are captured at the same moment, you need to place the pi so that the LED is captured at the same moment the bar is photographed. That means placing it below the target bar (ie, at the lower left edge of the display). The height of the Pi doesn't matter, just the left-right position. See photo at right.
2) Record! Once you have everything lined up properly just start taking a movie at the maximum frame rate of your camera (recall that 60hz is good enough but 240hz or higher makes the math much simpler). You'll want to record about 10 appearances of the white bar before stopping (Esc), just to be sure you have enough data.
3) Analyze. As discussed in the general overview, the simplest way to measure lag is to find the first frame of video where the LED goes from off to on - any amount of LED increase in illumination counts. Then from there count the number of frames until the target bar appears. This, times the length of each frame of video (1/FPS) gives the lag. An example: below are 3 frames of video, the first at left being the first frame of video where the LED turns on. We don't count that one. Then we count the next (middle frame). Then we count the frame where the target becomes visible. That's two frames times the refresh rate of the camera (NOT the monitor).

Note: why don't we count it as 3 frames? Because we don't know when the LED turned on, so we assume halfway thru the captured frame of video. And we don't bother to estimate when the target bar started to appear in the last frame, so again we assume halfway. so you could say we count 0.5 + 1 + 0.5=2. But it's easier to just count the last frame as 1 and skip the halfsies.
Good software for this does not appear to be available for android. But on the desktop there are lots of movie editing apps which allow you to step ahead and back by single frames. I use shotcut (Win/Mac/Lin).
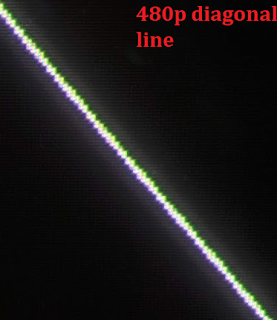
5) Measuring input lag for interlaced content, or different resolutions. Retro gamers will be particularly interested in input lag for 480i and 480p signals. The Pi can produce such signals over HDMI, which is probably the same as sending it over analog cables (both are realtime scanout protocols, at least). I've included several mode settings scripts:
tv1080p
tv480i
tv480p
tv720p
tvnative
The last one can be useful for checking the display's native resolution in a hurry. Also, the pi defaults to 1080p in some cases where the display can't handle it, so you could always type tvnative blind after logging in as root.
6) Supporting burst high-speed cameras. You can change the length of time the target bar is on the screen, to, for instance, capture several cycles of bar presentation on a high speed camera that only captures in short bursts. Type inputLagLED 8 to run it much faster, though this isn't really recommended unless your monitor has very little lag and super fast response time. The default is 20, the not so safe min is 4. A whole cycle of target and non target bars takes 2x the number you provide, divided by the refresh rate.
7) supporting slow cameras. Just to remind you, a slow camera doesn't stop you from using this tool, as long as it can record at 60 hz and you can do simple math.
Comments